Summary
This document provides instructions on how to extract custom data from an Analyst database using SSIS packages and the scheduling tool provided by SQL Server Management Studio (SSMS) to place data in a CSV type file within a designated folder. It uses a “Serica” project as an example.
Details
Create the Get Serica Data procedure
- Connect
Connect to Management Studio as “skfuser1”.
Note: If the local database user is something other than skfuser1 then use that name. - Create a new query
a. Click on the “New Query” button to open a query window.
b. Copy and paste the code from the attached file “Get_Serica_Data.sql”, into the query window.
c. Click the “Execute” button to create the procedure. - Disconnect
Disconnect user and close the query window.
Create SSIS Export Data Package
- Connect
Now connect to Management Studio as a Windows Authentication user.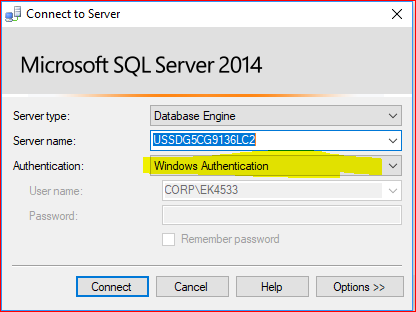
-
Open the Export Data wizard
a. Right click on “Management” and select “Export Data…” from the menu.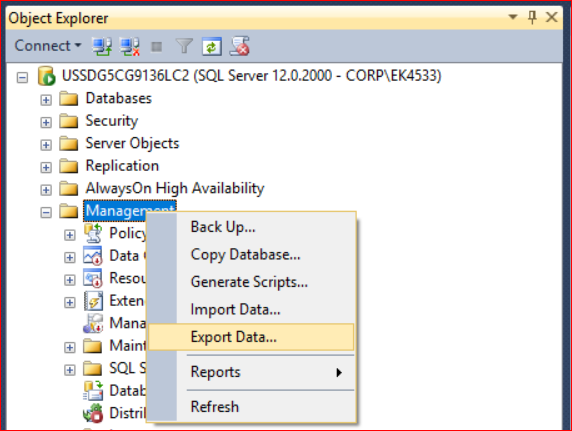
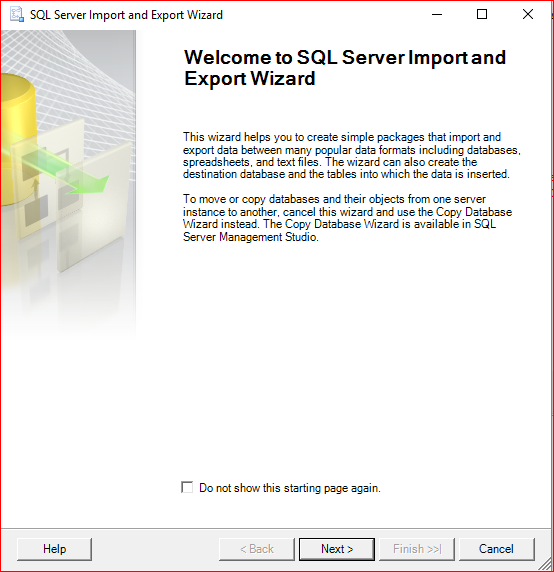
b. Click the “Next >” button on the welcome screen shown below.
-
Choose a Data Source screen
Make sure to replace the examples below with the actual information for Server name, Database etc.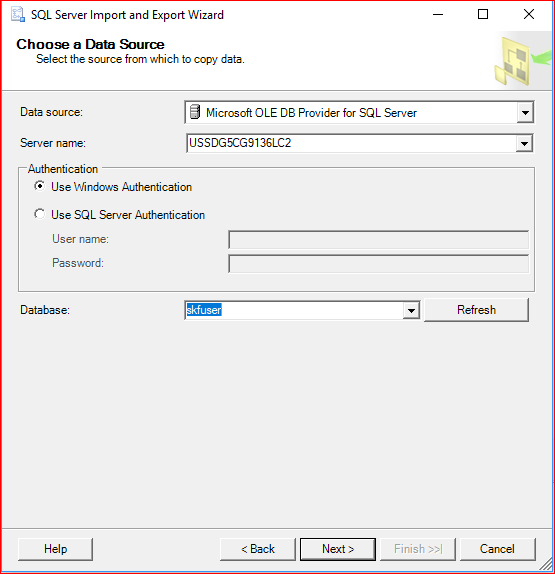
-
Choose a Destination screen
Replace the example path highlighted below in yellow, with the location where the file should be exported to.
Note: The inclusion of column names is optional. If they are not wanted then uncheck the “Column names” checkbox in the lower “Format” area.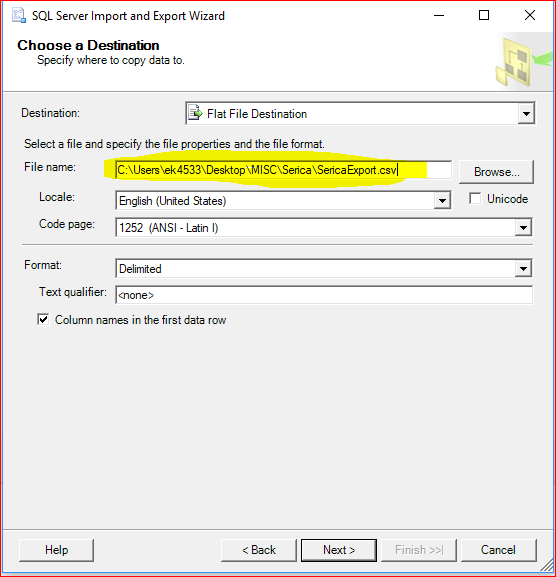
-
Specify Table Copy or Query
a. Click on the “Write a query” option.
b. Then click the “Next >” button.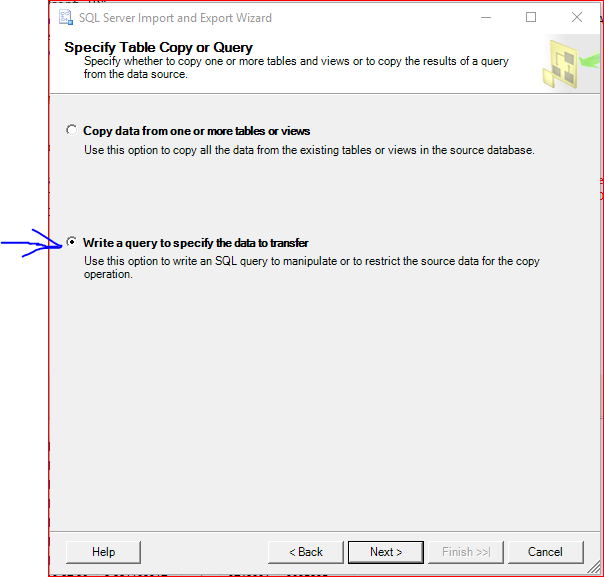
-
Provide a Source Query screen
a. Type the code shown, inside the “SQL statement” area.
Note: Make sure to use the actual database name if it is something other than “skfuser”.
b. Then click the “Next >” button.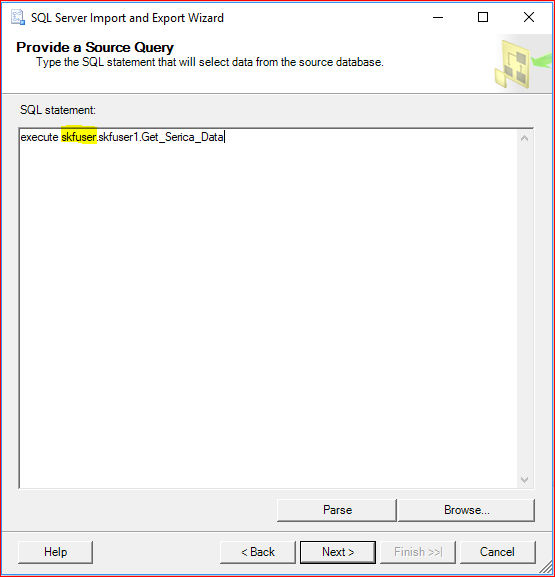
-
Configure Flat File Destination screen
a. Click “Preview…” to view the results.
b. When ready, click the “Next >” button.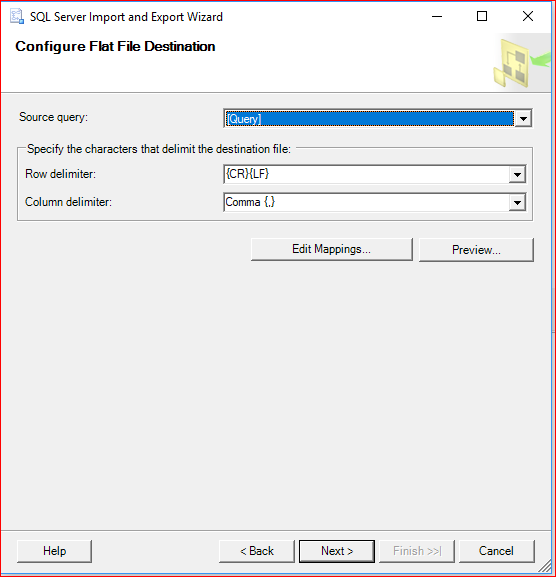
-
Save and Run Package screen
a. Make sure to uncheck the “Run immediately” checkbox.
b. Then click the “Next >” button.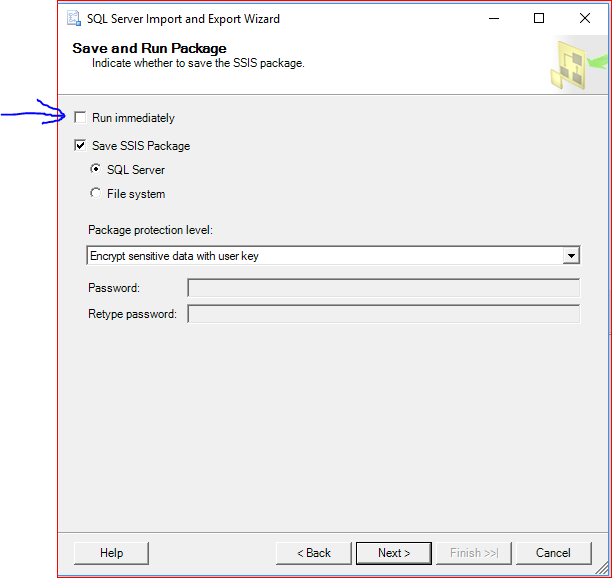
-
Save SSIS Package screen
a. Fill in the information shown in the screen capture below but using the appropriate Server name.
b. Then click the “Next >” button.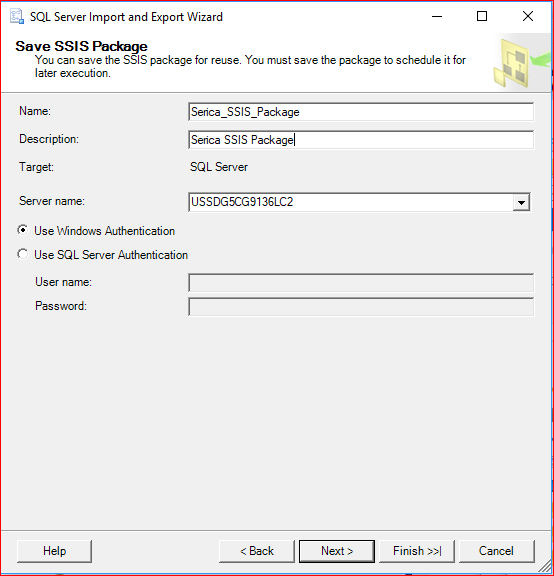
-
Complete the Wizard screen
Click the “Finish” button.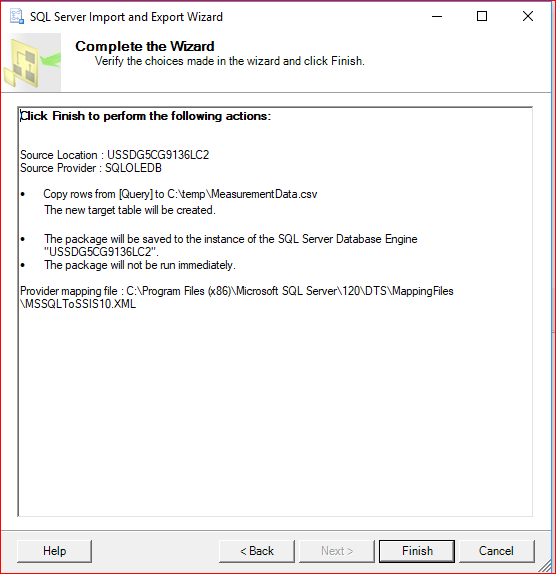
-
Create Serica Project using Integration Services
a. Open Management Studio and in the Server type drop-down choose: “Integration Services”.
b. Click “Connect”.
Note: This may require starting the SSIS service using the Services console/app.
c. Right click on “Integration Services Catalogs” and select “Create Catalog”.
Note: If disabled execute the code in the file “Enable_Create_Catalog.txt”.
Copy and paste the code then execute as a Windows Authentication user.
d. Follow the on-screen instructions (creating a password if required).
e. Follow the steps through, to create the project: “Serica Project”. -
Import Serica package into Projects
a. Right click on “Projects” and select “Import Packages…”.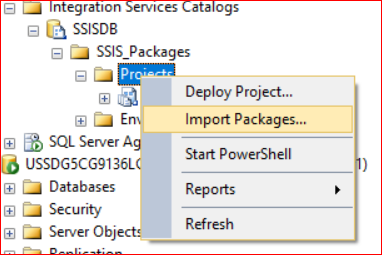
b. Introduction
Click the “Next >” button.
c. Locate Packages screen
Use the screen shown below to locate the package.
Note: Replace the server name shown with the appropriate name.
When ready, click the “Next >” button.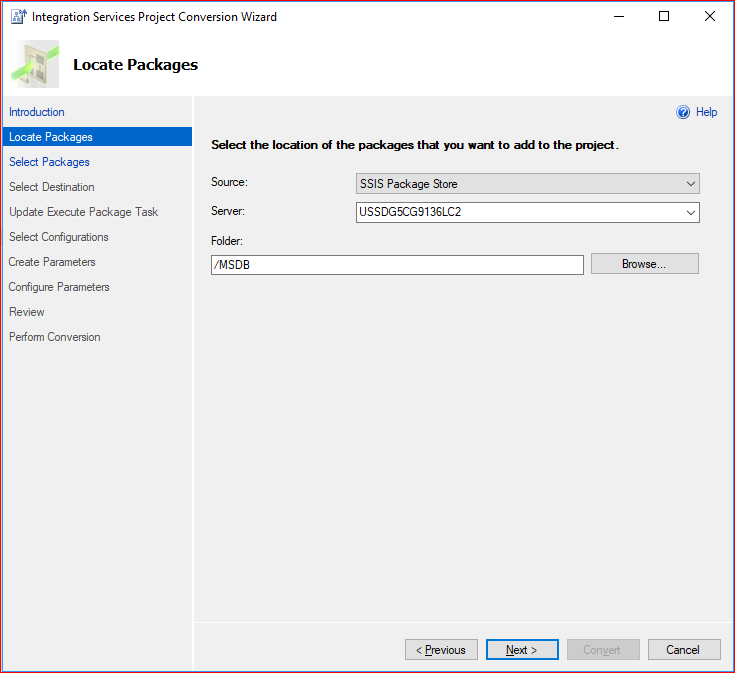
d. Select Packages screen
Select the Serica package as shown in the screen below.
Click the “Next >” button.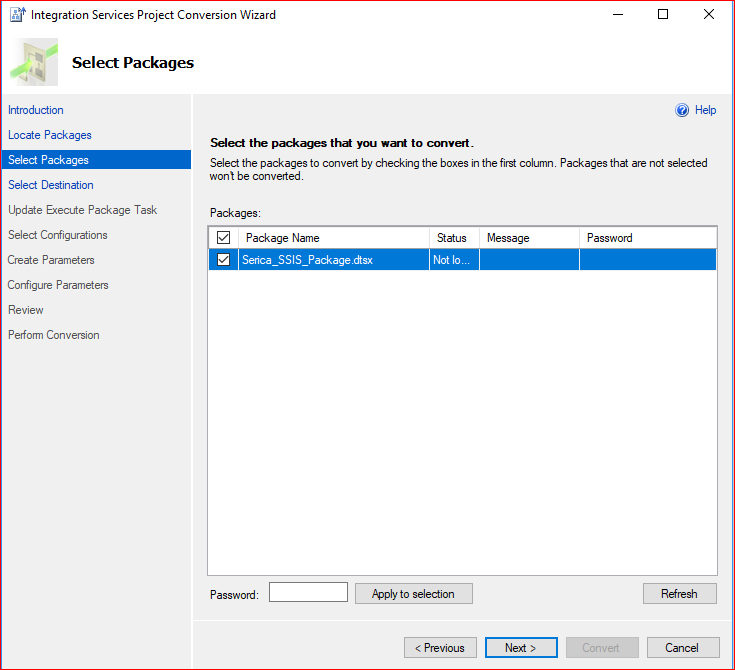
e. Select Destination screen
Fill in the path information for a location where the project can be stored.
When ready, click the “Next >” button.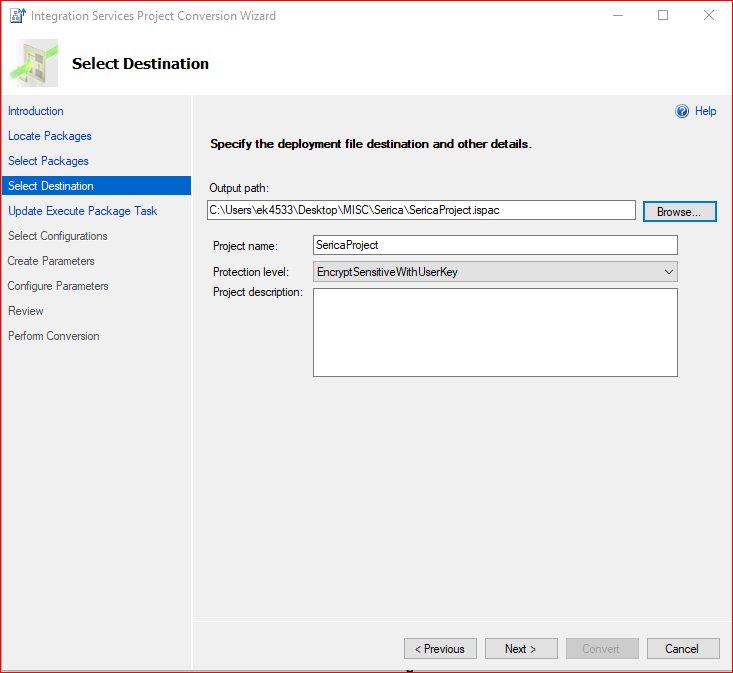
f. Update Execute Package Task screen
Click the “Next >” button.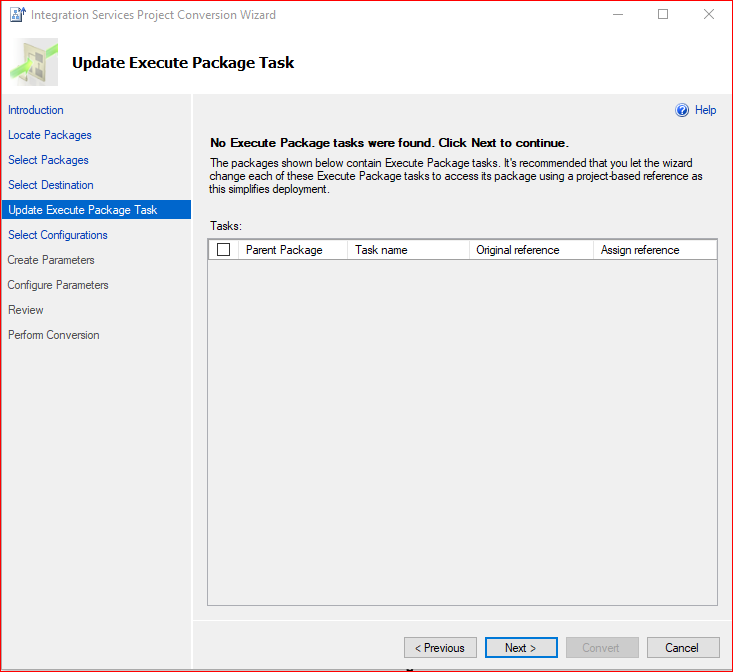
g. Select Configurations screen
Click the “Next >” button on this screen.
h. Create Parameters screen
Click the “Next >” button on this screen.
i. Configure Parameters screen
Click the “Next >” button on this screen.
j. Review screen
Click “Convert” and then click “Close”. Upon clicking the “Close” button the “Integration Services Deployment Wizard” will display next.
k. Introduction screen (Integration Services Deployment Wizard)
Click the “Next >” button.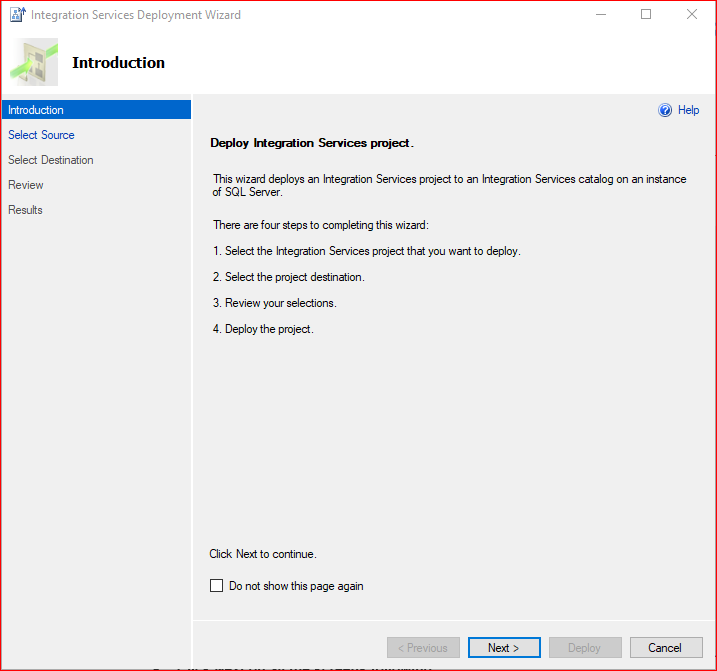
l. Select Destination
Select the appropriate server name.
Then when ready click the “Next >” button.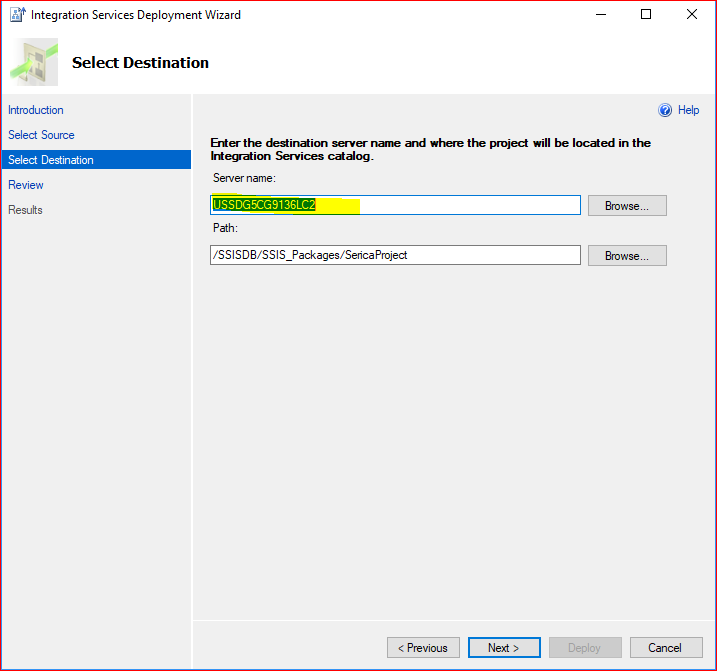
m. Review
Click the “Deploy” button.
Verify that the Results step displays “Passed”.
Click “Close”.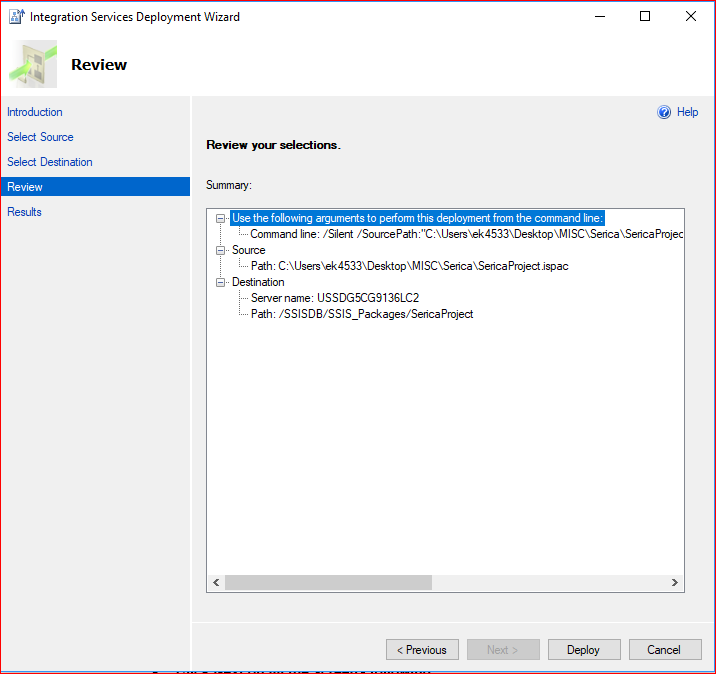
n. Projects
Now verify that the SSIS package has been created under Projects.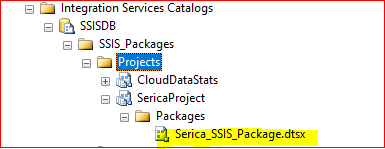
Create and Schedule the Serica Job
- Create a New Job
a. In Object Explorer (Windows Authentication connection), right click on “SQL Server Agent” and select “New”, then “Job…”.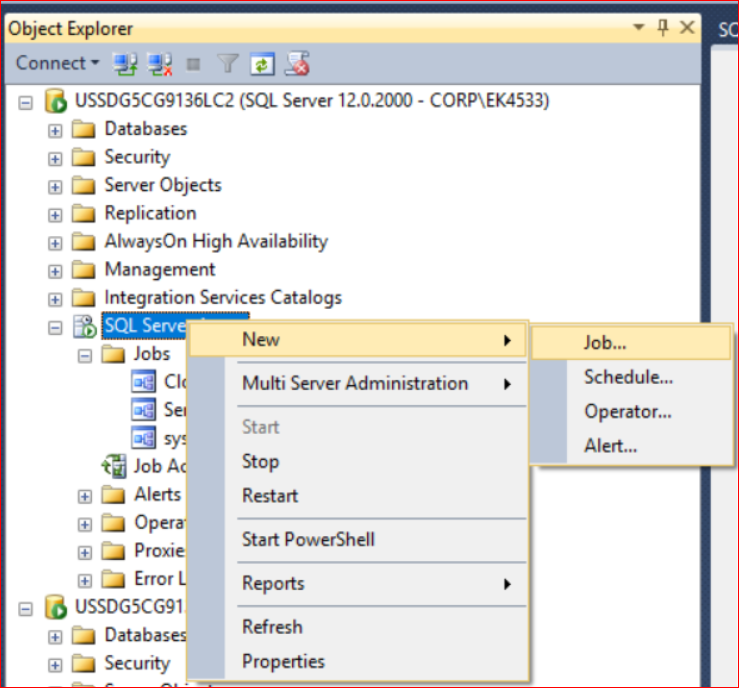
-
Set the properties of the new Job
a. Enter a name for the job.
b. Use “sa” or Windows authentication, for the Owner.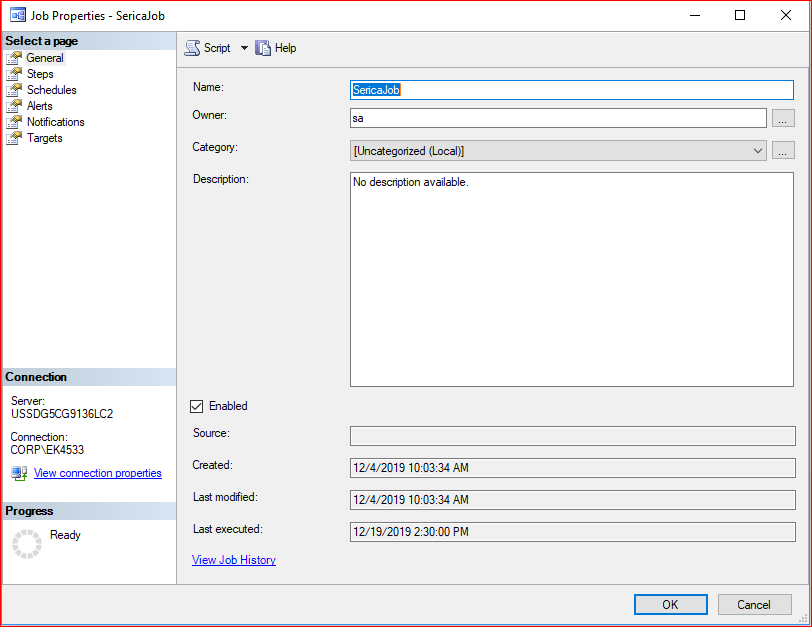
-
Create a Step to generate the data
a. Select the “Steps” page, and then click on the “New…” button.
b. Enter the information displayed below for the Serica package.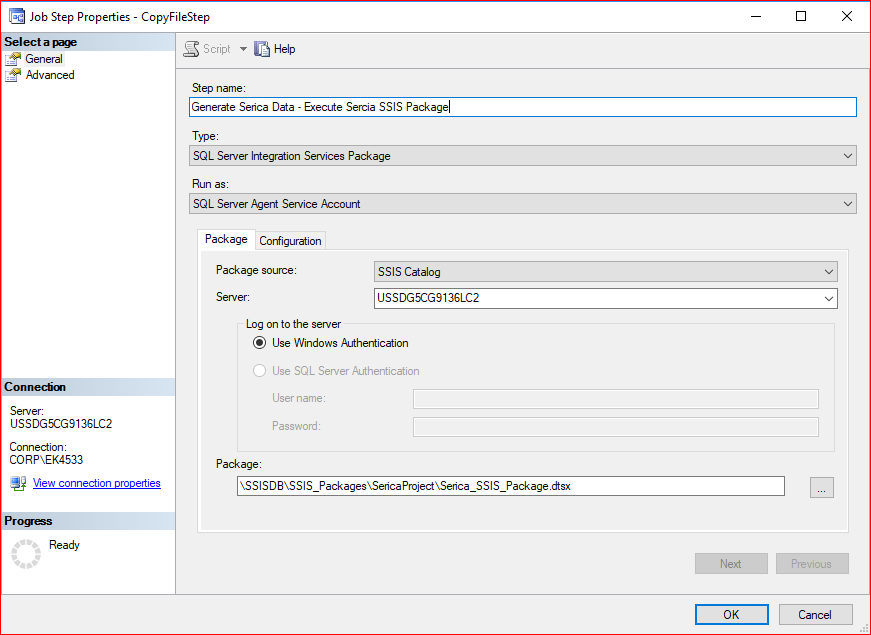
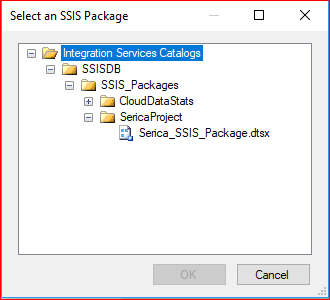
c. To select the previously created package, click the “…” button and navigate to the Serica package, then click the “OK” button.
-
Set the Job Schedule
a. Select the “Schedules” page, and then click on the “New…” button.
b. Populate the schedule information as desired, see example below.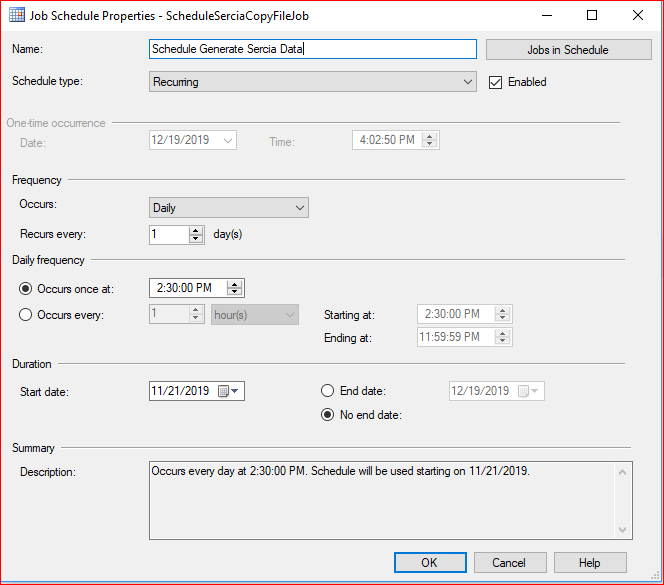
-
Click OK to close the “Serica Job”
-
Test the data generation
a. To verify data generation, right click on “SericaJob” (or the job name used) and select “Start Job at Step…”.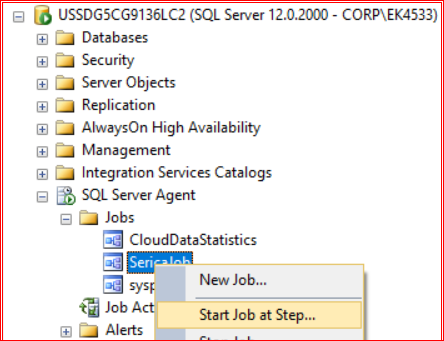
b. Verify a CSV file has been created in the folder selected. See the attached sample file for an example.

Comments
0 comments
Please sign in to leave a comment.